Pages

where sisters, sibling rivalry, and creativity collide.


Friday, August 16, 2013

Debbie's 5x5 #5

It can be a lot of fun to sew for girls - tons of fun fabrics, ribbons, laces, styles, etc.

Boys?  Not so much.

I did find some cute 'boy' fabric when I was in Idaho last month.  The line is "Backyard Baby" - and it was love at first sight.
I plan on making a short sleeved, collared shirt for Henry out of the top fabric "Backyard Party".

I haven't decided what I'm going to do with the 'Ant Maze' - but I'm happy to have it!

awesome.
I made some overalls for Henry to wear with the shirt I plan to make.  They're pretty cute...and might actually come close to fitting him in about 6 months. Or 8.
I'm not technically 'done' - I still need to add 4 buttons (two at the top and two on the side cargo pockets) - I plan on buying some buttons this afternoon - but I might not get them on today due to date night.

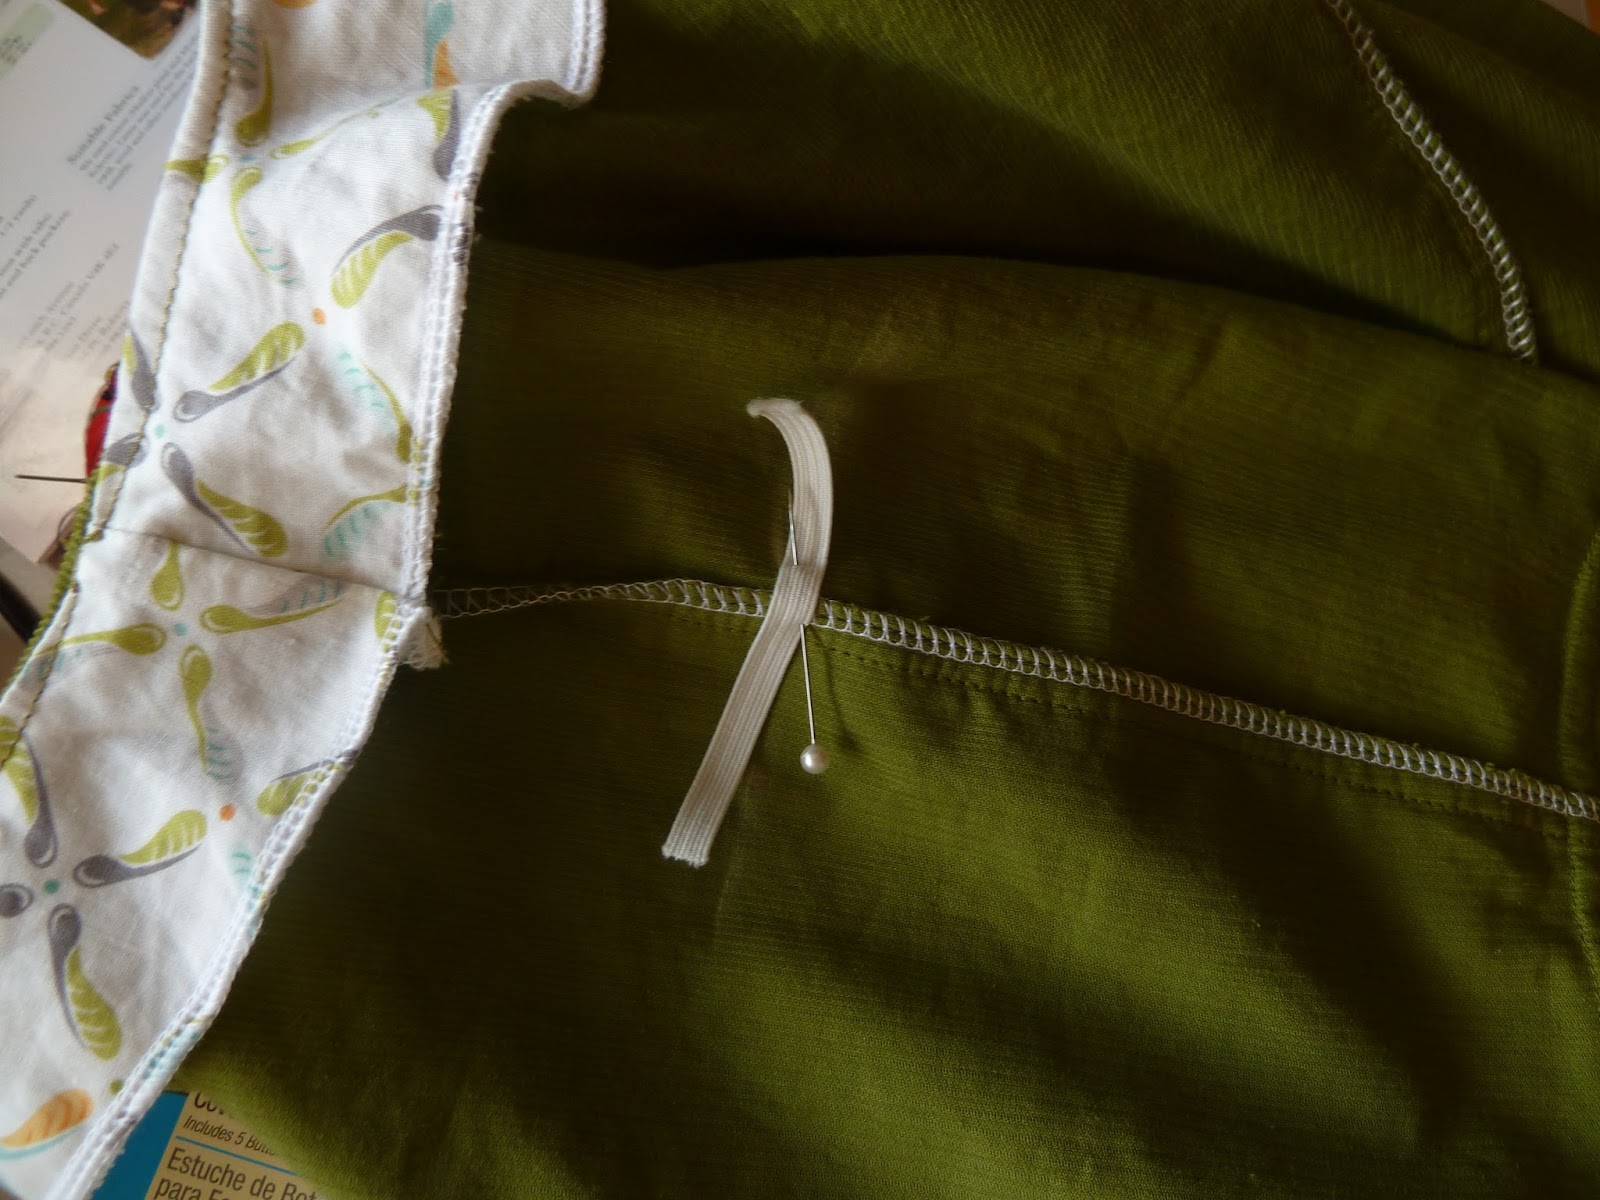
The overalls looked ginormous on Henry - so I added a bit of elastic to each side.  I drew a chalk line and then stretched the elastic while zig-zagging (I worked my way out from the side seams). The overalls are still huge, but hey, it's better than being too tiny.

Thursday, August 15, 2013

Keira's 5x5: Day Four

In our Picnic Basket:  Salt and Pepper Kettle Chips in a brown paper bag with washi tape, Trader Joe's English Toffee and Caramel Corn, and Raspberry Juice (with plaid red paper and black dot washi tape (I'm so hipster!)), and avacado, bacon, cracked pepper sandwiches. 

We went to the Mother/Daughter Pool Party and this was my chance to make it extra super cute.

Maren did her part.

Times Eleventy!

But the Applewood bacon was no slouch either.

And the avacado sang.

Hung up!

3 x 5 continued... I popped over to Suzanne's to today and finished up the art work from yesterday. Sanding, staining, and some more woodburning, and now they are done!

The shark has been pickled and looks ready for the beach.


My favorite of these 3 is the moose. It was extra work, but so worth it :D


Kevin was on his way out the door this morning and asked casually what my plans were for the signs. I shrugged and admitted that I really didn't have any. He then pitched that he would be willing to find a place on our crowded walls for the map if I was willing to keep it... He didn't have to twist my arm! And now it is hung high up in our map filled living room... Sorry everybody else ;)

Debbie's 5x5 #4

Upcycled Button Caddy

I found this spinning condiment caddy at Target a few weeks ago.

I love the fact that it spins.

I also love fun shaped jars.

Add the two together, along with a couple of coats of black chalkboard paint, some goo-gone and there you have it.

Sorted buttons at my finger tips!

                  Jars from L to R:  Jam, sun-dried tomatoes, stone-ground mustard, lemon curd, some kind of spice.

Suzanne 5x5 Day 4


I'll give Debbie 1/4 credit for today's project.  I stole the idea off her Pinterest board.  So with a bit of underhanded sneakiness I give you...

Magnets!

Not just any magnets, they have coinage from around the world.  

Strawberry Rhubarb Flummery filled Cupcakes with Stabilized Whipcream Topping - Project 4 of 5x5

So, there are three recipes here to get to one absolutely fabulous cupcake!


Cupcake

1 box French Vanilla Cupcake mix made per instructions
1 vanilla bean soaked in 2 Tablespoons of water for 30 minutes

Remove vanilla bean and split open full length of bean half way through the bean.  (You are laying it open.)  Take the edge of a sharp knife and scrape out seeds.  Stir seeds into cake mix and let it sit for about 20 minutes covered.  Bake per instructions for cupcakes.

Flummery

3 cups rhubarb cut into 1/2" pieces
1 Tablespoon water
1 cup sugar
1/4 cup cold water
3 Tablespoons cornstarch
1 cup strawberries, washed and sliced into medium sized pieces.
3 drops red food coloring

Heat rhubarb, sugar and 1 tablespoon water in a 3 quart saucepan until it boils - about 3-4 minutes, reduce heat.  Simmer uncovered about 5 minutes, stirring occasionally, until rhubarb is tender.  Mix cornstarch and 1/4 cup cold water, stir into rhubarb mixture.  Heat to boiling, stirring constantly.  Boil 1 minute.  Remove from heat, stir in strawberries and food coloring. (You may want to add another drop or two until it looks red/pink. 

Let this cool to room temperature.  Don't put it in the fridge, it gets a little goopy.  (NOTE:  I had to strain, through a fine mesh colander, my first batch because the rhubarb was stringy but the second one was fine.)  If you want it a little less chunky stir flummery when cooled to break up the strawberries.

Stabilized Whip Cream Topping

1 tsp unflavored gelatin powder
2 Tablespoons cold water

2 cups heavy whipping cream
4 Tablespoons confectioner's sugar

In a glass measuring cup sprinkle gelatin over 2 Tbsp cold water, stir to dissolve.  Place in fridge for 10 - 15 minutes until is the consistency of an unbeaten egg.  Whisk until smooth.  Replace in fridge until time to add.

In a chilled tall sided bowl - or a regular one - beat heavy cream and sugar until soft peeks form - don't go a moment longer!  Add gelatin and beat in for about 20 seconds.  Place in fridge until ready to use.

Now let's bring this baby home....

Rhubarb Flummery filled Cupcakes

Core your room temperature cupcakes so you can fit about 3 - 4 tablespoons of flummery in the center.  Eat each core.  No really.  Go ahead.  Place flummery in a large baggie and snip off one corner.  Fill each cupcake to the top but don't over fill.  Place whipped cream in a piping bag with a very large tip.  Pipe cream over top of each cupcake.  Place fresh washed and dried strawberries on top. 

These will sit out very well but should be refrigerated until ready to be served.

These don't take very long to do really.  I started the cupcakes and made the flummery.  While the flummery was cooling I made the whipped cream.  The cupcakes took 10 minutes to cool in the fridge so really it was about a 40 minute process to do 2 dozen.

Wednesday, August 14, 2013

Suzanne's 5x5 Day 3

Let's just say, none of this is for my house.  But they are projects that I need to get done so they can leave my house.  (And Tia gets 1/2 credit ;)  Lots of sanding yesterday and today, vacuuming, blowing, getting rid of dust, and the first coat of primer on.

Primed nightstand and desk
Pinterest inspired coffee table;
Nearly done staining and ran out!
Industrial Chic Coffee Table on Castors
I'm in a paint fume haze as I try and type this post.  Let's just say, I might need a break from the paint for a day or two.