Pages

where sisters, sibling rivalry, and creativity collide.


Tuesday, August 13, 2013

Suzanne's 5x5 Day 2

Yup, it's been one of those days.  Busy doing lots and not much to show for it.  Good news, I took a picture of my small, yet monumental, project of the day.

Missing Moulding
Replaced!
I have many of these..."almost" done projects that just need a special tool, or the right color paint, or time to get done.  I'm sure that once school starts, I'll magically get all of these done, right?!

Debbie 5x5 #2 Composition Notebook Cover

While I'm waiting for paint to dry, I thought I would post this little project.  It's a perfect little back to school project that any beginner could whip up. (here's a link to a tutorial that I sorta kinda followed).

Step 1: draft a pattern.  This is not hard AT ALL.  Simply take 3 sheets of 8 1/2 x 11 inch paper and tape them together on the long edges.  Trim 1/2 inch off of one long edge to give you one large 11 x 25 inch pattern piece (that is my green paper).  Do this again (yellow paper).  After trimming the 1/2 inch off of one edge, fold your pattern in half and design your pocket.  The 'wings' on mine are about 4 1/2 inches tall by about 4 1/3 inches long.  The top flat bit is about an inch wide.  After marking those off, I just connected the dots with a long diagonal line.
Step 2: Cut two of the rectangle and two of the pocket.
Step 3:With right sides together, sew along the top edges of the pocket, leaving the top bit open.  Clip the corner where the diagonal meets the straight bit, turn and press.  Top stitch over seam.  At this point I then top stitched a line right down the middle and down what will become the fold line.
get it?
Step 4: Now that the pocket is done, sandwich it in between the  rectangle pieces.  The rectangle pieces should have their right sides facing each other.  Stitch around the outside, leaving about a 4 inch opening at the top.  Clip corners and turn right side out. Press.
Step 5: Using your top stitching lines as a guide, stitch over them, through all layers.  At this point you can add more top stitched lines for pencils and pens if you want to.  I added a line approximately one inch over from the fold line.
Step 6: Fold under the seams where you left the opening.  Press well.  You're going to be top stitching the top and bottom - it's now time to fold the ends (the part with the wings) to the inside.  Pin in place, then stitch about 1/4 inch from the top and again at the bottom.

 I actually ended up lining my rectangle piece with a bit of muslin because the yellow fabric was a little see-through.


What's better than a bookcase? Two bookcases!


We had a special order this week for 2 bookcases/ shelves and a bench... rustic... approximate proportions. I love that lady! We had one bookcase done and the bench, so this morning I finished up the sister shelf... related, but not identical :D Gotta love sisters!

Keira's 5x5: Day Two


What do all mothers say? Never go into a love affair hoping to change him.  Of course that's what I did.  I was in Washington last week and I saw this little number at Marshall's.  And boy was it little. Way too short, sleeveless, a dress (which, as I nurse at church, presents problems). I bid the black and cream waving pennant fabric and snappy collar adieu.  Some things are not meant for ladies like myself.  So, with a wave and curiously wet lashes, I walked away.  Sadder but wiser.

However, like the  Taylor/Burton romance, it wasn't over.  Debbie endured my tedious havering and finally drove me back to get the blasted thing.

Quelle horreur!
Our project challenge was what tipped the scale.  It's an A-line skirt so I flattened it out on a table an drew a curve along the hem , extended for a seam allowance, another longer , same shaped one 6inches lower, and a pair of straight lines connecting the two, following the A-lines.  Got it?

Sew, sew, sew.  It was super easy and quick.  But...

Since I matched the collar fabric, I found I wasn't thrilled with the seams.  They didn't press nice and sharp.  It looked tacked on. Fail.

When I showed it to Kylene, she suggested I throw cotton over it, crank the iron up and hope for the best.  Success.

It worked wonders (excuse the photography again) and helped the hemline on my wedding skirt enormously.


Project 2 of 5 OR Didn't I just do this?

Step 1: Take seat off chair.  Mine had four screws
in the bottom so flip it over on the table top for easy removal.
Strip the seat using an Exacto knife (or you can pull out
a thousand stupid staples that you are covering up)
Step 2:  Buy 1"-2" dense foam. Draw out seat on to foam.
Using an electric knife cut out foam with a slight angle
from seat to top. (Straight will make it look too boxy.)


Step 3:  Make a pattern for the new cover
fabric. You can measure or just eyeball it.
Step 4:  Using your pattern, a long ruler, and pattern chalk, draw
out the new seat covers.  If your material has a
pattern you need the ruler to get the material straight. You do
not want to cut corners and fold the fabric to make several
at once unless it is a solid color.


Step 5:  Center your foam and seat on fabric. Glue foam to
seat - any foam approved glue is fine.
 Using a staple gun, electric or hand, place a single staple in
the center front, pulling firmly do the same to the back and then
the sides.  Place staples about 1" apart (depending on the fabric).
I used a thin staple that doesn't damage the fabric too much. 
When we bought this dining set 14 years ago it had black seats.  After just three years they were destroyed by food, paint and feet.  The blue I used to recover them then held up quite well but it was time for a change.  Lauren and I found the fabric at Britex in San Francisco.  

Monday, August 12, 2013

Bathroom - If you give a Hanna a Cookie...

Hideous fluorescent fixture Jim swore he would replace
upon purchase of home ... 14 yrs ago.
I took a small sledgehammer to the light box.
Connor helped with the Saws-all.
Nice work.


New fixture.  What you don't see is the two weeks of
work filling, sanding, filling, sanding (x infinity)
and painting.

New shower area fixture too!
(The old one was 'accidentally' broken when I was painting.)


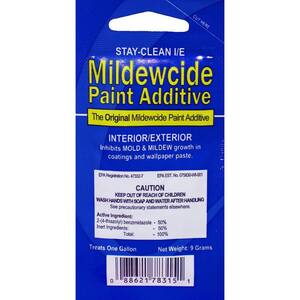
 So, this all started out as a mold problem.  Our bathroom has a 10' peak and poor ventilation. I went to Home Depot who sold me some great Behr paint that had a mildew inhibitor in it.  But as I was talking to Hal - yes, I know the paint guy by name - he said with a problem this bad I may want to try a mildewcide.  This is what he recommended.  It didn't change the color or texture of the paint and gives off not fumes. 


So, the pictures above are also of my 1 1/2 weeks of cleaning, sanding, filling (x infinity) and painting the bath and vanity areas.

How to Prep Art for hanging in a bathroom

1.  Select art for bathroom that is from archival materials which is more likely to withstand the humidity.  Painted art or art printed on acid-free paper works best.

2.  Varnish painted art.  This will preserve and protect it from the moisture.  Apply a thin coat or use spray on varnish.  You do not have to do this with art printed on acid-free paper.

3.  Protect printed art in a frame, glass or plexiglass.  Mount printed art on archival quality foam core that is acid and lignen-free.

4.  Do not let the art touch the glass but it should be sealed completely in the frame.  I used GE Premium Waterproof Silicone - clear.

Vanity "Yellow Bike"

These prints are from a local (SF) artist.
"Clock"
Go to:  www.fonarow.com


Artist is Craig Fonarow Photography
"Orange Trolley"